Have you been thinking about creating your podcast? This tutorial will take you from start to finish and give you step-by-step instructions on adding a podcast to your WordPress website.
We will go over the basics of how a podcast works, show you some quality equipment, give you tips in choosing a hosting service, optimizing your podcast for search engines, and more.
When you’re finished reading this tutorial, you’ll have all of the information you need to create your very own podcast and add it to your WordPress website. If you’d rather leave it up to a professional, visit our podcast website service page to learn how we can help.
Ready, let’s go.
What is a podcast, and how do they work?
A podcast is an audio series that is typically broken down into episodes. The episodes can either be downloaded or streamed through different platforms and applications.
For your podcast to be available to the public, you’ll need to have an audio file and an RSS feed. Because WordPress has a built-in RSS feed for blogs, it is a natural choice for podcasters.
It’s easy to connect your podcast with several applications such as iTunes, Stitcher, Soundcloud, Anchor.FM, Audioboom, and more. The simple process makes it easy for you to increase exposure and grow your audience. We’ll explain in more detail later.
Now that you know the basic requirements for a podcast let’s go over setting one up.
How to set up your podcast.
For your fans to be able to listen to your podcast, you’ll need the following:
- A podcast website or blog where people can learn more about you and your podcast.
- Recording and editing equipment to produce the audio files.
- Publishing tools to get your podcast on to the internet.
We’ll guide you through the process of setting up a podcast below. If you get stuck or need help, please feel free to comment on this post or email us at web@blaksheepcreative.com. We’ll be happy to help.
Choose a domain name and web hosting for your site.
First, you have to choose a domain. Your domain is the name people type in to find your website.
Typically, you’ll want to use your podcast name if it’s available, but anything will work.
Simply go to GoDaddy, NameCheap, or any other domain registrar to find an available domain and register it.
We won’t go into much detail on choosing a domain because each has a different process, but all of them will help you.
Next, you need to have a place for your website to live on the web. This is what we refer to as hosting (this is different from where your audio files are hosted on a podcast network, we’ll explain later).
We highly recommend self-hosted WordPress due to its flexibility in terms of design and functionality.
Most Popular Podcasting WordPress Themes 2020
— New Template (@NewTemplatee) October 12, 2020
Check it out: https://t.co/5AsvbCjIDp#newtemplate #themeforest #wordpresstheme #envato #nthemez #designthinking #podcastWordPressthemes #wordPresspodcastthemes #videopodcastWordPressthemes #podcastingnetworkswebtemplates #podcasting pic.twitter.com/3oaY8fTnZT
There are dozens of excellent podcast WordPress themes to choose from, as well as unlimited plugins to handle everything from SEO to speed to security and more.
No matter which website template you choose, when you go with self-hosted WordPress, you’re free to customize your site how you see fit.
You don’t even have to be an HTML genius or know how to code. Drag and drop builders like Divi and Elementor page builder make creating any WordPress website quick and easy.
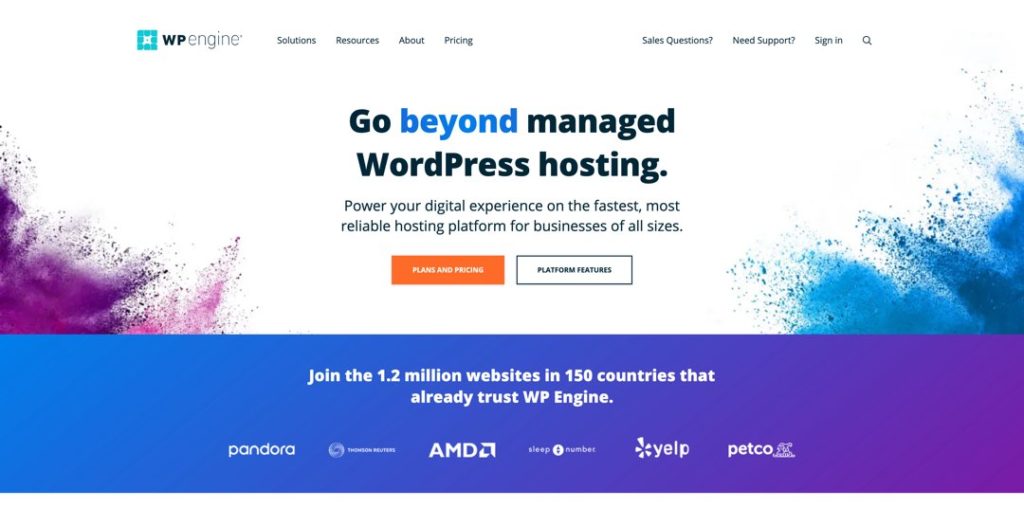
When it comes to WordPress websites, WPEngine is, without a doubt, the best. They’re somewhat pricey compared to other hosting providers, but the security, daily backups, and speed are well worth it.
After you register your domain name and purchase hosting for your website, you can proceed with setting up your WordPress site.
Because this article is mainly written for people wanting to add a podcast to an existing website, we won’t go through setting up your WordPress site, but here’s an excellent tutorial:
Selecting a hosting platform for your media.
Because audio files are big, you should not host them on your web server. If you do host them on your web server, they’ll consume a lot of resources and slow your website down, completely ruining user experience and search engine rankings.
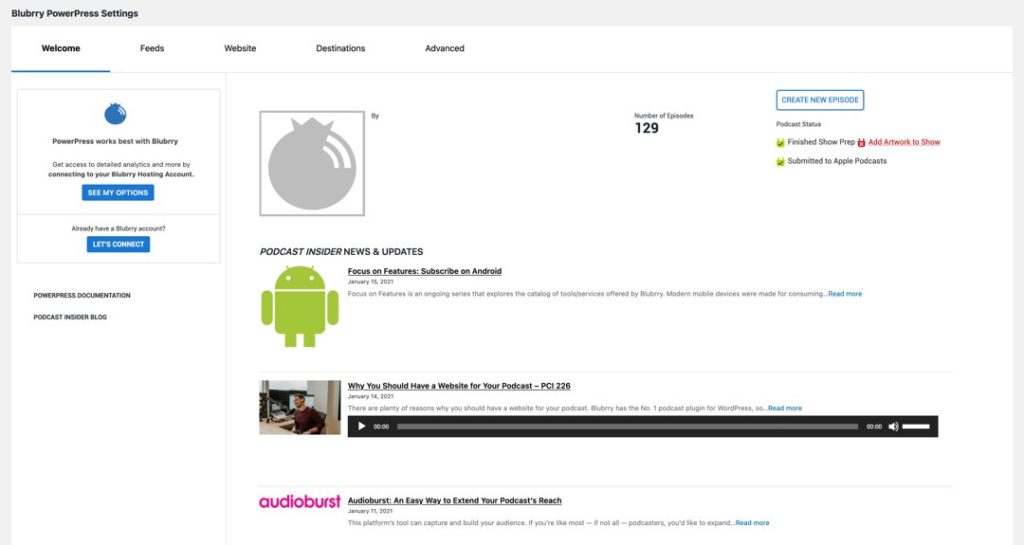
For best results, you should use a specialized media hosting service.
There are several podcast hosting services and podcasting apps to choose from, such as:
For this tutorial, we’ll use Blubrry. It is one of the most popular podcasting hosting providers for many reasons:
- Blubrry is optimized for podcasting with WordPress. The Blubrry PowerPress plugin gives you complete control over your podcast from within your WordPress dashboard.
- They have a massive user community and forums to connect with other podcasters and get support if you need it.
- They feature several helpful features such as free listen and download statistics, website/podcast feed/SEO tools, audio and video players, iTunes and Google play optimization, and much more.
- Blubrry’s media hosting is top-notch, ensuring that your audio content loads quickly and plays clearly to your listeners.
At this point, go sign up for Blubrry and set up your account and podcast information there.
Essential equipment for podcasting

Microphone
Although there are several great tools that you can use to produce a high-quality podcast, a great microphone is a must-have item.
It’s critical to record using a quality microphone. It’s not required that you have a Shure SM7B microphone like Joe Rogan, although it’s well worth it if you can afford the $400.
Instead, choose something better than your computer’s built-in microphone so that you don’t sound like you’re talking into a pillow.
Audio recording software
In addition to a high-quality microphone, you’ll need software to record and edit your podcast’s audio. Many podcasters use Audacity because of its ease of use and price point (it’s free).
You’re not recording a multitrack symphonic concept album, so you’ll want to stick with simple recording software and leave ProTools to the professionals.
In this article, we’ll stick to Audacity and show you how to use it for your podcast.
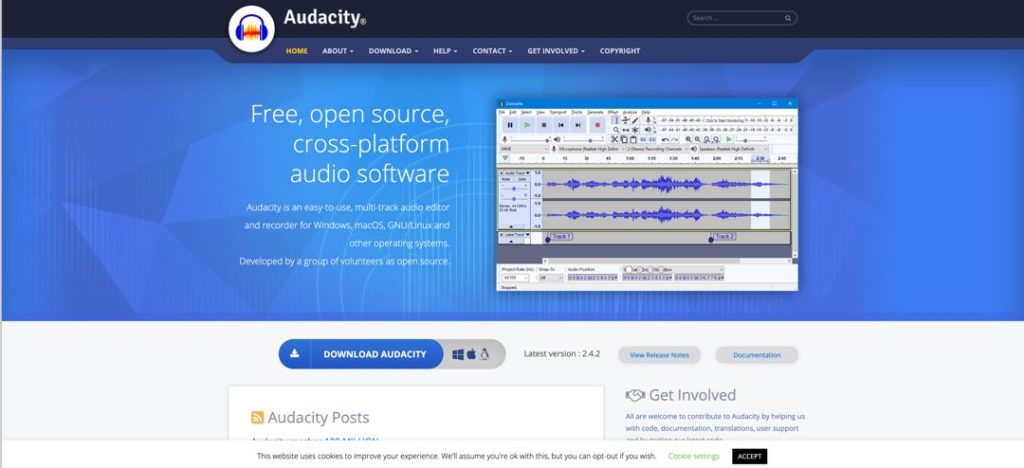
After you’ve downloaded and installed Audacity, open up the software and go to the File menu to create a new project.
With your new project created, you’re all set to start recording. Click on the record button to start recording.
You’ll be able to edit your podcast when you’re done recording, so don’t worry about any unwanted noises or pauses. You can edit those out later.
After you’ve recorded and edited your podcast, it’s time to export it.
Most podcasters export their audio files as MP3s or MP4s because their file size is small, yet they have excellent audio quality.
When naming your podcast files, include the episode number in the file name to help you organize your recordings in your archive.
Also, for the sake of both organization and SEO, name your files something other than 01000043.mp3.
Instead, use descriptive text, no underscores, and try to slip keywords in the file name if at all possible. For example:
Fighting-baton-rouge-traffic-episode1.mp3
Keep all of your recordings in a single folder on your computer until you archive them on the cloud or USB (which you’ll want to do for safe-keeping and to keep your hard drive free of space).
For more information on all of Audacity’s features, be sure to browse their step-by-step tutorials.
Publishing your podcast on WordPress
Once you have your first podcast episode, it’s time to publish it on your website.

Login to your WordPress dashboard, go to Plugins > Add New in the left sidebar. Search the repository for PowerPress and install the PowerPress Podcasting plugin by Blubrry.
There’s another podcasting plugin you might hear about called – Seriously Simple Podcasting.
For the purposes of this article, we’ll use PowerPress, because it’s just that good.
After the plugin is installed and you activate it, you’ll notice a new item on the left sidebar of your dashboard.
Click it to configure the plugin.
First, you’ll need to configure your hosting services from within the PowerPress plugin. Again, for this article, we will assume that you’ve chosen Blubrry for your hosting provider.
If you’ve opted to use a different host for your media and need help, contact us, and we can help you.

Next, go to PowerPress in the left sidebar of your WordPress dashboard, and click on Settings.
Click on the Let’s Connect button, which will take you to the Blubrry Services Integration window.

Then, enter your Blubrry username (email address) and password. Make sure to save your changes by clicking Save.
Now, you’ll need to complete all of the information on the PowerPress settings page.
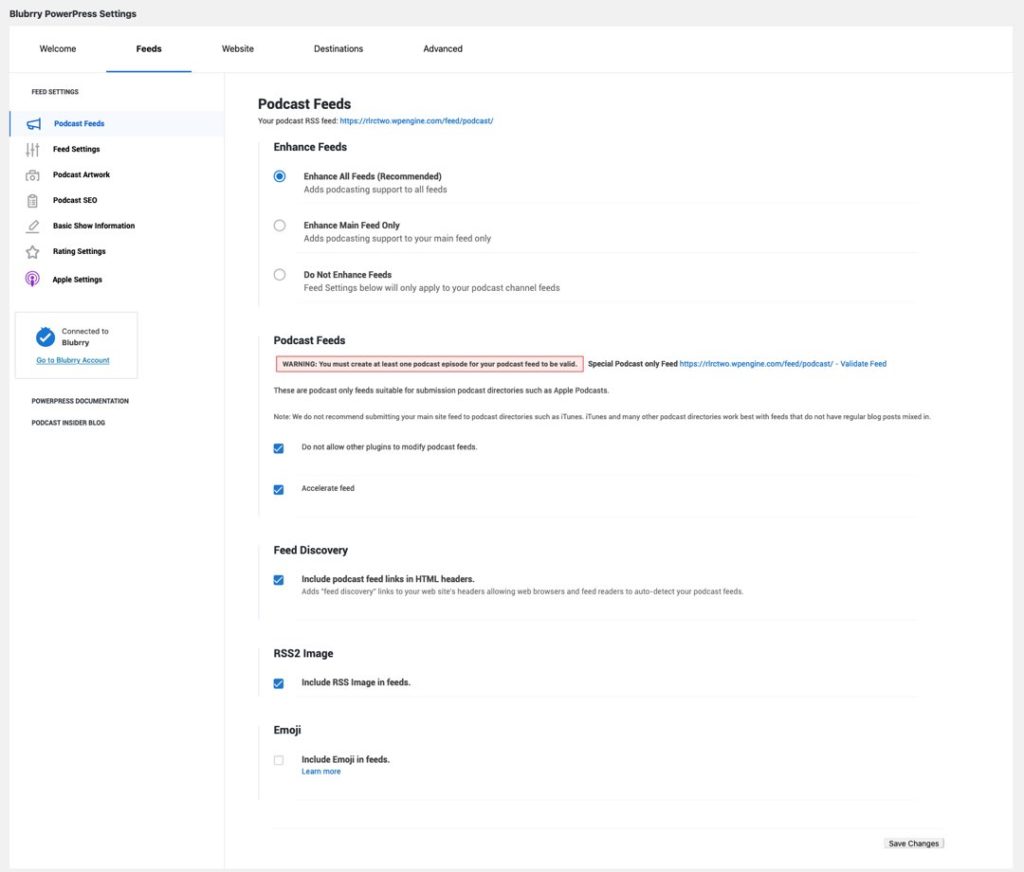
PowerPress Settings
Feeds
Click on the feeds button, then click on the podcast feeds row on the left to set up your podcast further. Make the settings look like this, replacing the placeholder text with information specific to your show.
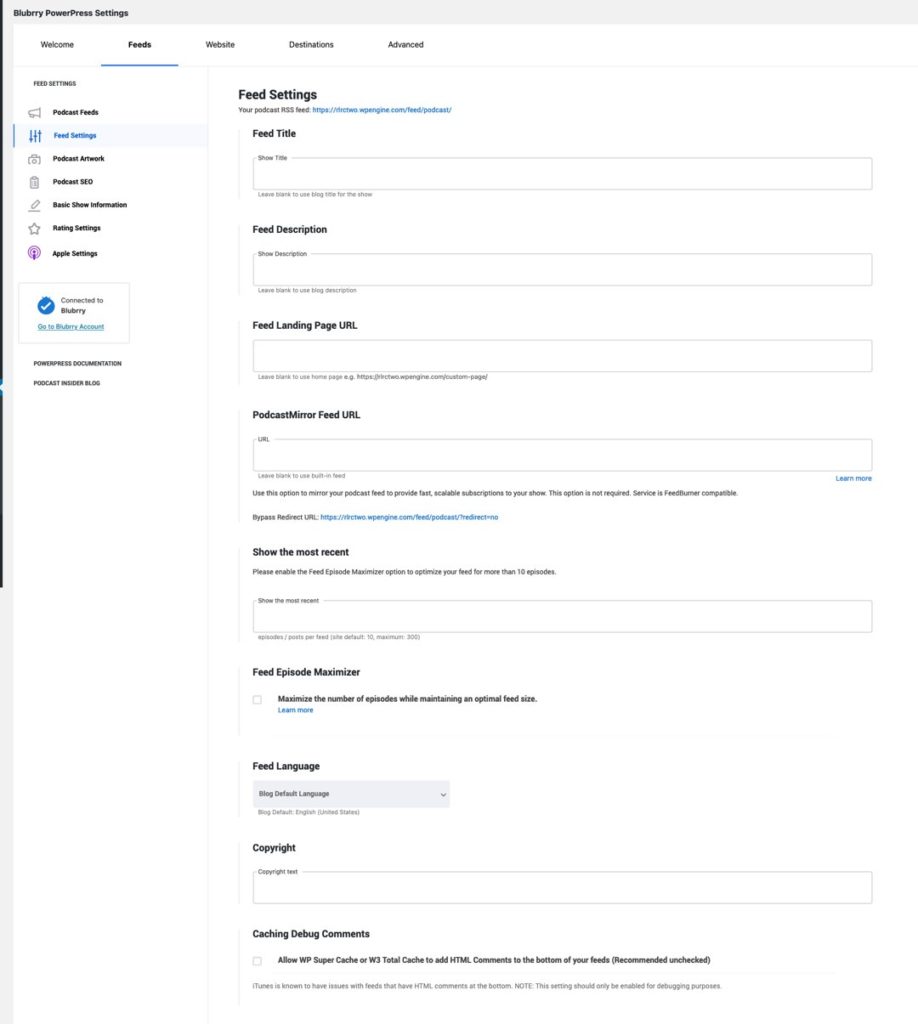
Feed settings
Complete all of the input boxes with your podcast’s information.
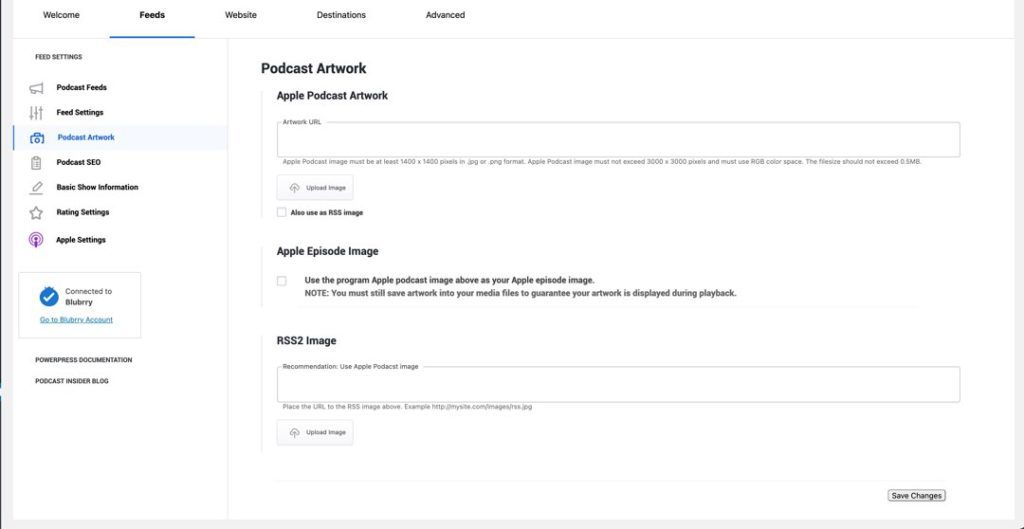
Artwork and iTunes Image
Enter the image URL to an image hosted on your website that you want to use for your podcast. It needs to be a minimum of 1400 x 1400 pixels and should be in either JPEG or PNG format.
Again, name this image something descriptive like “The SEO Podcast by BlakSheep Creative.”
Both search engine spiders and visually-impaired (and other users using screen readers) use your file name and alt text to determine/describe your image when necessary.
Upload your podcast’s artwork, paying attention to the plugin’s requirements.
Podcasting SEO
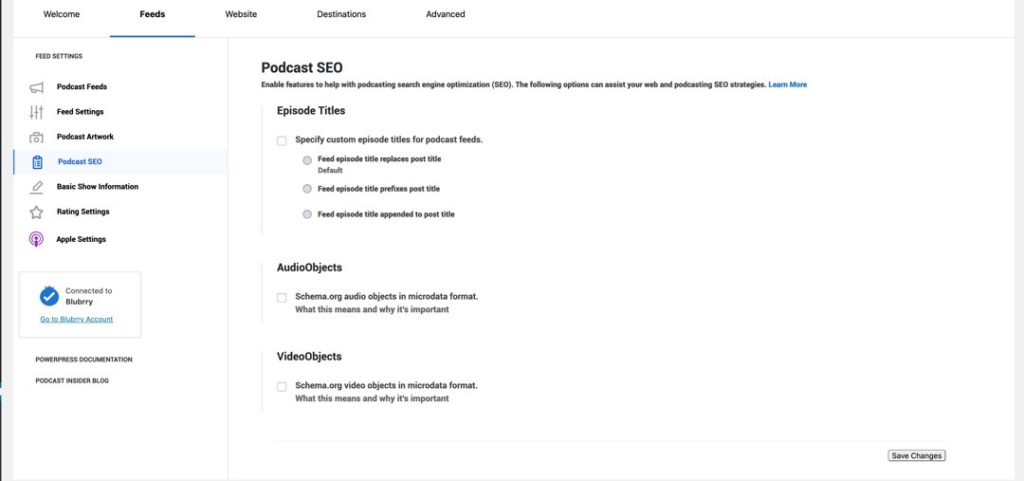
In this section, you can tweak the SEO settings for your podcast.
Pay attention to the two following items, as they help you get a little SEO boost in the search engines.
- Schema.org audio objects
- Schema.org video objects
Selecting the applicable one will insert markup to help search engines better understand your podcast and help serve your website in search engines results pages.
We’ve written an excellent article about the importance of optimizing your podcasting for search engines and why you should do it for success.
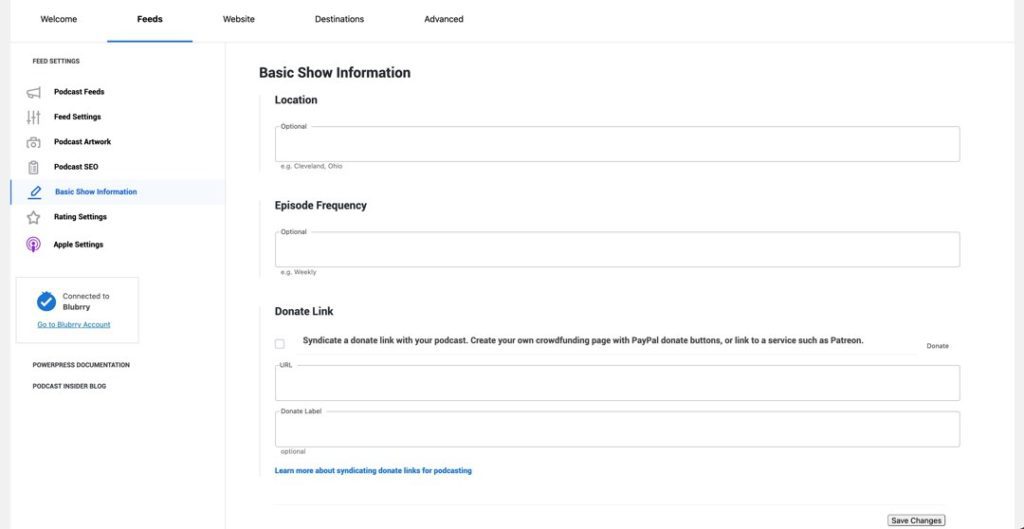
Basic Show Information
Complete the fields on this section as applicable. It’s pretty straightforward.
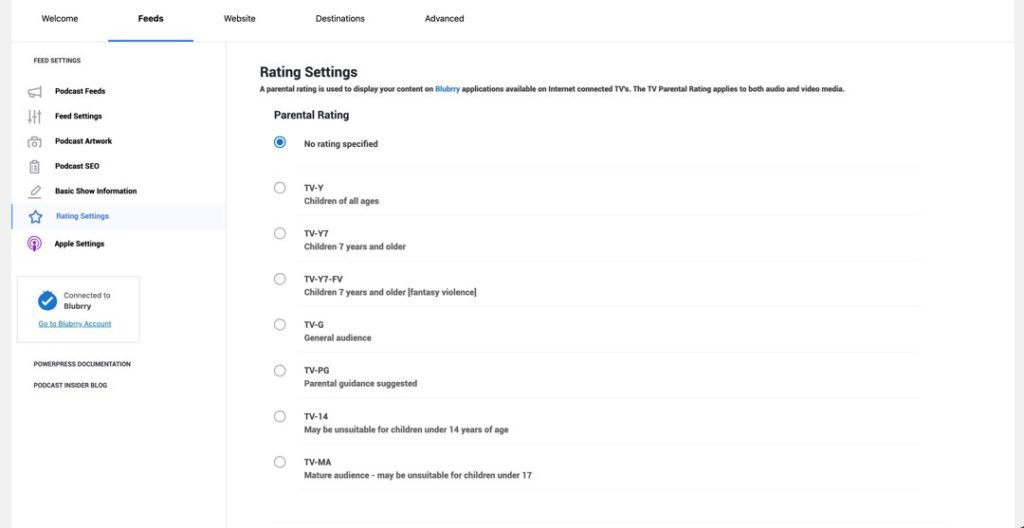
Rating Settings
Select the appropriate audience for your podcast and note if your show contains explicit content.
Apple Settings
- iTunes Program Subtitle – Intro subtitle for iTunes. Use your tagline if you have one.
- iTunes Program Summary – Summary of your program (up to 4,000 characters)
- iTunes Category – Select an appropriate category for your podcast.
- iTunes Explicit – Select whether your podcast contains explicit material or not.
- iTunes Type – If you want your most recent episode displayed first, choose episodic. If you want your newest episode listed last, choose serial. (episodic is the default setting).
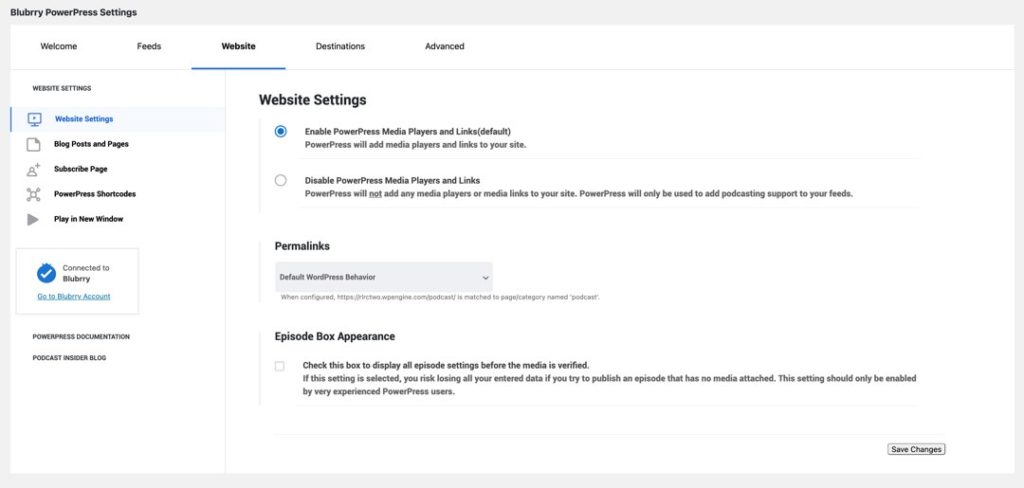
Website Settings
Here is where you’ll configure the PowerPress plugin for your website (whereas we configured your plugin for your podcast in the step above).
Complete the website settings section like below.
Blog Posts and Pages
Display Media & Links
Choose the default location for your podcast player and media links. By default, they appear below the page’s content, but you can also choose to put them above the content.
If you want, you can disable this entirely and add the PowerPress shortcode [powerpress] manually. Using the shortcode tends to be the best option, as it gives you complete control over the player’s placement.
After you’ve configured the rest of the plugin’s settings, make sure to click the save changes button at the bottom of the page.
Pro tip: When working in WordPress, you can never press the save button too much. Save after you’ve made any significant changes to avoid losing your work.
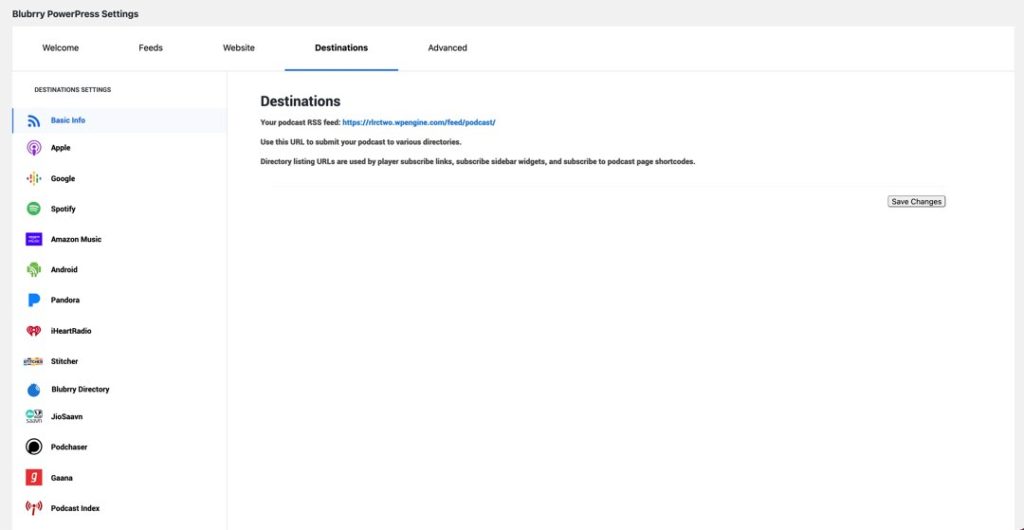
Destinations
Go through and complete all the sections for each of the places where you want your podcast to go, i.e., Apple, Google, Pandora, etc. Chances are, you’ll have to make an account at each of those locations.
Uploading your audio files to Blubrry

Before you publish your podcast on your site, you’ll need to upload the audio file to Blubrry.
First, log in to your Blubrry account. Then click the button in the upper right-hand corner to visit your Podcast dashboard.
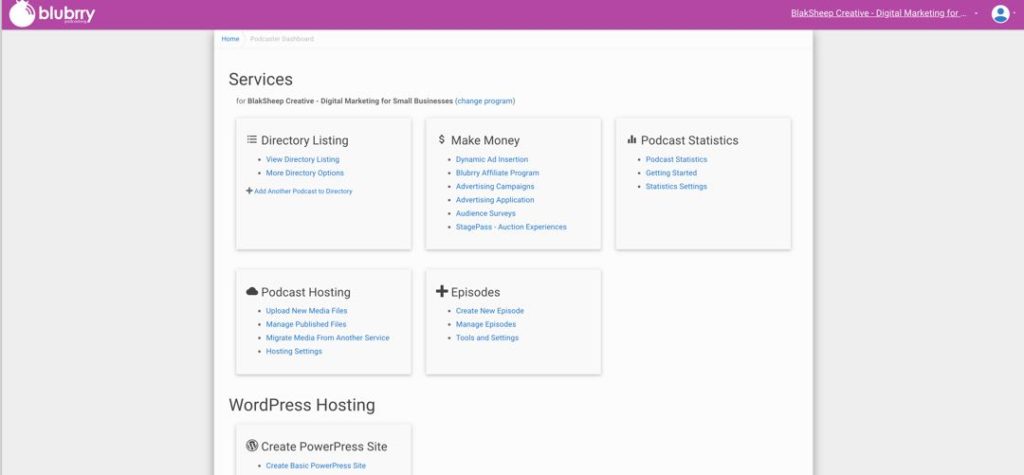
In the Podcast Hosting section, click on Upload New Media Files.
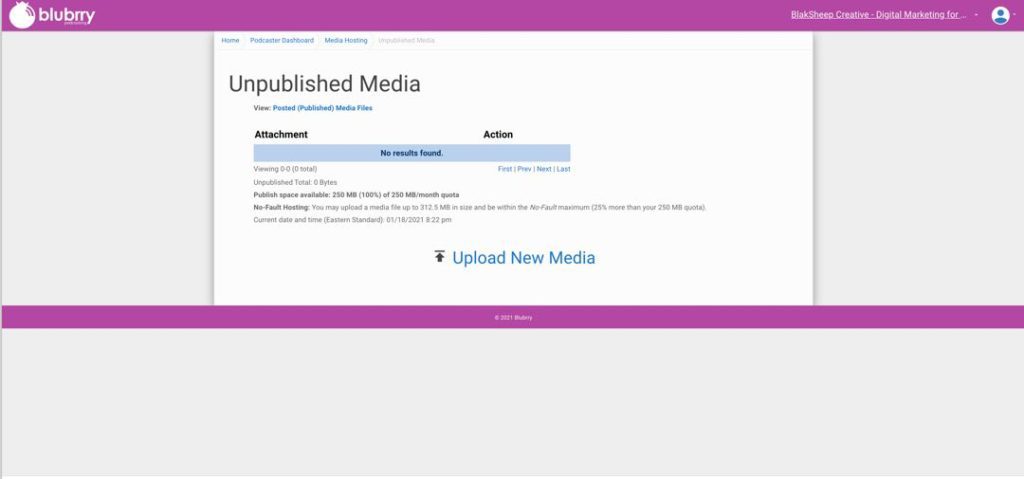
In the Podcast Hosting section, click on Upload New Media Files.
In the next screen that appears, click the Upload New Media link near the bottom and upload your file.
Now that you’ve uploaded your audio file, you’ll be able to add it to your WordPress site.
Configuring your podcast player
Episode Titles – Use this section to adjust the title of your podcast feeds.
- Feed episode title replaces post title (default)
- Feed episode title prefixes post title
- Feed episode title appended to post title
AudioObjects – Adds Schema.org audio objects to your podcast (enable this). Schema markup is extra code that lets search engines your podcast’s content and will give you an SEO boost.
VideoObjects – Includes video objects in microdata format. If you use video in your podcast, you’ll want to enable this.
Podcast Directory SEO Guidance – Turning this on will give you more control over items relating to Podcast Directory SEO, including:
- Highlight fields for Podcasting SEO
- Enabling the iTunes Subtitle field
- Enabling the iTunes Author field
- Enabling the Enhanced iTunes Summary feature
After configuring your SEO settings, make sure to click the Save Changes button.
To learn more about Podcasting SEO, visit our recent post, “Podcast SEO 101: How to Optimize your Podcast for Search Engines.”
Audio Player
Although there are several plugins that you can use to add a podcast player to your WordPress pages and posts, we’ll stick to the one that comes with PowerPress.
Go to PowerPress in the left sidebar of your dashboard and click on audio player to choose the player you want to use.
Choose from the following players:
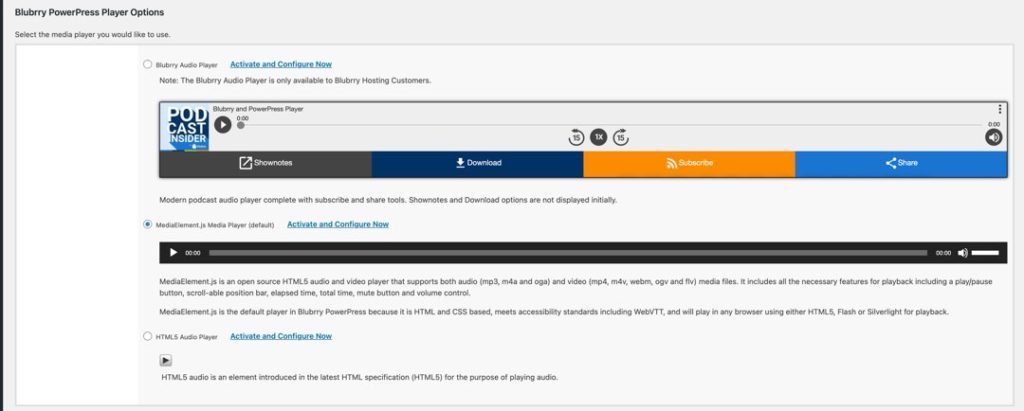
Blubrry Audio Player – This modern audio player is only available to customers using Blubrry’s media hosting service. It has both subscribe and share tools, show notes, and download options.
MediaElement.js Media Player – This is the default HTML5 audio and video player for Blubrry. It supports both audio (mp3, mp4, and oga) and video (mp4, m4v, webm, ogv, and flv) media files.
It also includes various playback features and has a play/pause button, scrollable position bar, total and elapsed time, mute button, and volume control.
Powerpress’s default player is HTML and CSS-based and meets accessibility standards, including WebVTT. It can be played in any browser using HTML5, Flash (although outdated), or Silverlight.
HTML5 Audio Player – This bare-bones player was created for HTML5 and plays audio-only.
After choosing the player you’d like to use, as always, be sure to click the Save Changes button at the bottom of the page.
Video Player
If your podcast includes video, you can include the Blubrry video player in your podcast also.

MediaElement.js Media Player – This player has the same features as the audio player but also plays video.
HTML5 Video Player – This video player uses the latest HTML5 specifications to play videos.
VideoJS – This is an HTML5, Javascript, and CSS video player that falls back to Flash for non-HTML5 browsers. You have to install and activate the VideoJS – HTML5 Video Player for WordPress plugin to use this player.
MP3 Tags
If you’re using Blubrry to host your media files (which we recommend), you can also configure your MP3 ID3 tags before publishing any episodes of your podcast.

While the default settings will work just fine for most podcasts, you can adjust the following items if you’d like:
- Title Tag
- Artist Tag
- Album Tag
- Genre Tag
- Year Tag
- Track Tag
- Composer Tag
- Copyright Tag
- URL Tag
- Coverart Tag
To add your cover art, enter a URL to an image hosted on your website (e.g., mysite.com/images/podast-art.jpg). It is a best practice to size your cover art at 600 x 600 pixels, saved as a GIF, JPEG, or PNG file.
Adding your podcast in WordPress
After uploading your media file and configuring your podcast player, it’s time to add your podcast in WordPress.
First, create a new post by going to Podcast > Add New in your dashboard’s left sidebar.
The good thing is that the plugin has created a custom post type to leave your posts free for typical blog posts.
This time, instead of showing you an image of how to do it, we’ll show you a completed one from one of our clients, Real Life Real Crime by Woody Overton, an award-winning true-crime podcast with nearly 2M downloads!
Notes:
- We built the RLRC Website site uses the Divi page builder to give it a little extra pizazz.
- They use Audioboom instead of Blubrry, so the url may look different, but the idea is the same.
In the edit post area, scroll down to the Podcast Episode section. Here you will add a link to your media file.
If your file is hosted on Blubrry, you can click the folder icon to locate the file or enter the media URL manually. If you’re hosting your file elsewhere, you have to enter the URL.
Once you’ve added the media link, click the Verify URL button to double-check that you’ve added the correct link. Now, you can go back to the top of the edit post screen to add some details.
First, give your post a quality title. Then, you can add a nice description for your podcast episode, which will help optimize it for SEO. Next, add the [powerpress] shortcode to embed the Blubrry media player wherever you’d like within your post content.
You’re now ready to publish your first podcast episode and preview it to see what it looks like. Adjust whatever you need to, and start sharing it.
Submitting your podcast to iTunes
After you add your podcast to your WordPress website, it’s time to get more listens and subscribers by submitting it to iTunes.
Podbean has an excellent article on how to submit your podcast to iTunes. Click the link to visit it, or watch the video below:
Next visit ITunesconnect and login.
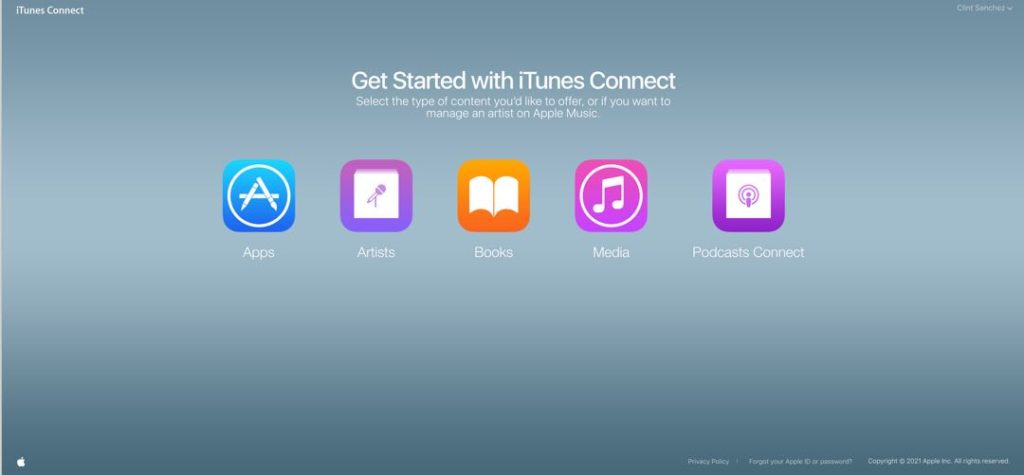
To submit your podcast, you’ll need to have an Apple ID. If you don’t have one, sign up.
After logging in, click on the Podcasts Connect icon.
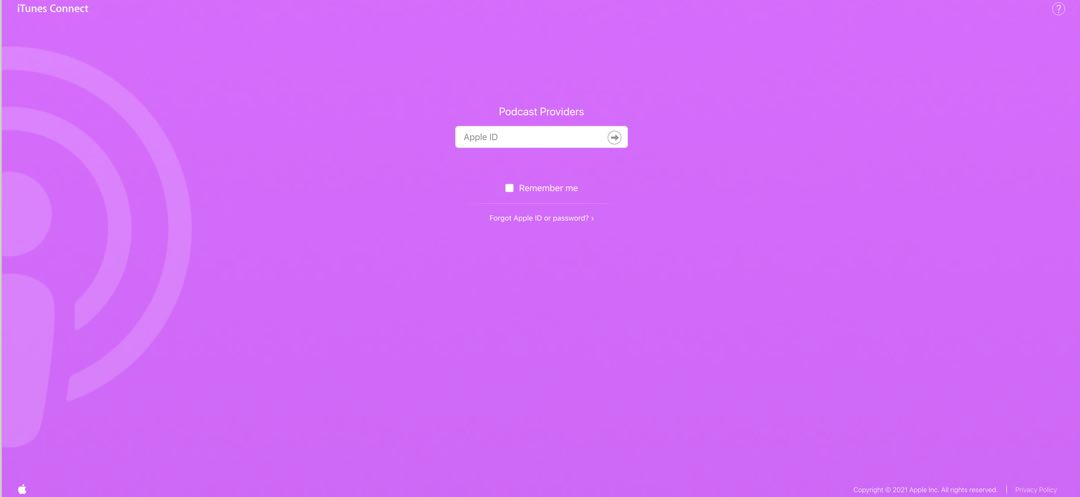
Next, you’ll be brought the Apple Podcasts Connect login screen. Go ahead and login using your Apple ID.
Then, you’ll be taken to a page where you will enter your podcast feed URL (the same one that you used before).
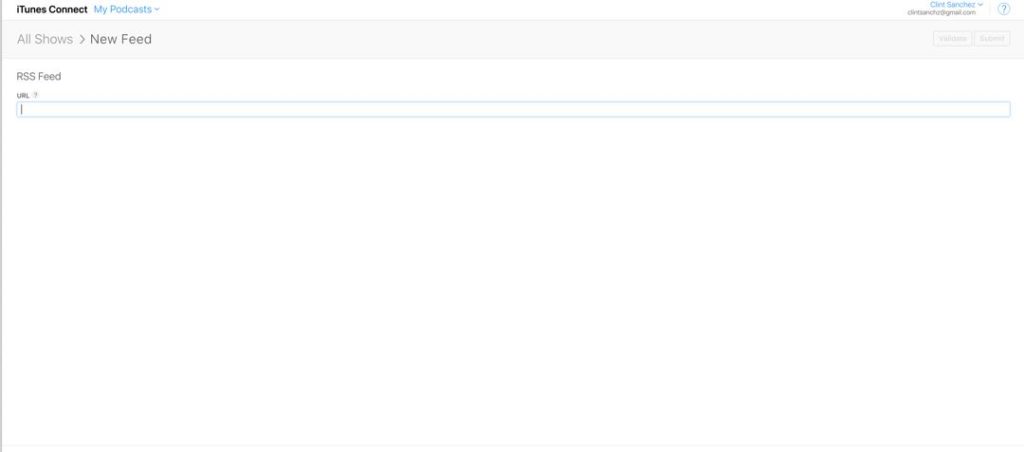
Enter the URL and click on the Validate button to check your podcast and see if it is ready for
iTunes. If there are errors, go back to your website and fix them within the PowerPress settings.
In the next screenshot, we’ve added and submitted an episode, but created errors for you to see what they may look like.
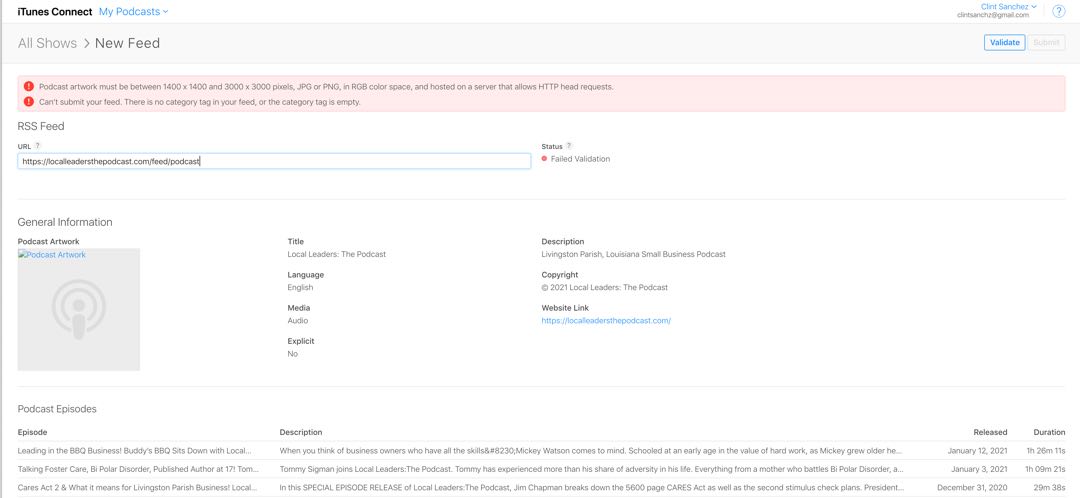
Once your podcast is validated and you are satisfied with it, click on the Submit button.
Once you submit your podcast, it will be added to iTunes’ review list, and once approved, iTunes will include it in their directory, and you will receive an email notification.
Monetizing your podcast
Your podcast costs you money to create, right?
There are fees associated with your website, podcast hosting, recording hardware, and software, so why not make a little money on your podcast?
There are many ways to make money with your podcast, including those listed below.
Sponsorships – Often, businesses sponsor podcasts, either on an ongoing basis or supporting a particular episode. A common way is to mention the sponsor at the beginning of your podcast.
Advertising – You could offer 30-second advertising spots just like on the radio. These spots can be sold to businesses, or you can use them yourself to drive listeners to affiliate products that you recommend.
Donations – Your listeners can help support your podcast by donating. You can add a PayPal button to your website and make it easy for anyone to contribute.
eCommerce – You can add an online store to your website and use your podcast to promote and sell your products.
Affiliate Links – Use your podcast to drive subscribers to your affiliate links. Include them in the show notes in a special section called “recommended products” and add links to your affiliates.
Guest hosting and appearances – Once your podcast becomes successful, you can offer others the opportunity to be a guest host or appear on your show and charge them a fee.
Email list – Use your podcast to help build your email list. Email marketing is one of the tools you can use to sell products and services, so don’t overlook it. You can then sell products and services VIA your email list.
Conclusion
Well, there you go. Hopefully, this tutorial has given you enough information to start a podcast on a WordPress website.
If there’s anything that we can do to help you create your own WordPress website for your podcast, or if you’d rather let a professional do it for you, contact us, or complete the form below for a free consultation.


